

It used to be that, once you installed WordPress and made all the necessary template design changes, you were stuck with having the same sidebar appear on all pages / posts of your WordPress site. If you were stumped by PHP coding and didn’t quite know how to edit your template’s source code (the files that actually determine what your template will look like), you couldn’t have a custom sidebar without paying a programmer to create one for you.
Introducing Widget Logic
Widget Logic makes it possible to display different sidebars on different pages through a control field in the configuration settings of each widget. You may be wondering why you’d want to display different sidebars throughout your WordPress site but it is a handy feature that some clients request.
For example, you may want your Twitter widget to only appear on blog posts, rather than blog pages. Or you may want your opt-in box to appear only on certain pages. I’ve even had clients who have different navigation elements displaying in their sidebars based on the section that their visitor is in.
Widget Logic makes those kinds of differences possible.
WordPress Conditional Tags
The Widget Logic plugin requires an understanding of WordPress’ Conditional Tags.
From WordPress’ documentation: Conditional tags are used to control what content is displayed on a particular page and how that content is displayed depending on what conditions that page matches.
How this works with Widget Logic is that if a condition is “true”, then display everything in this widget.
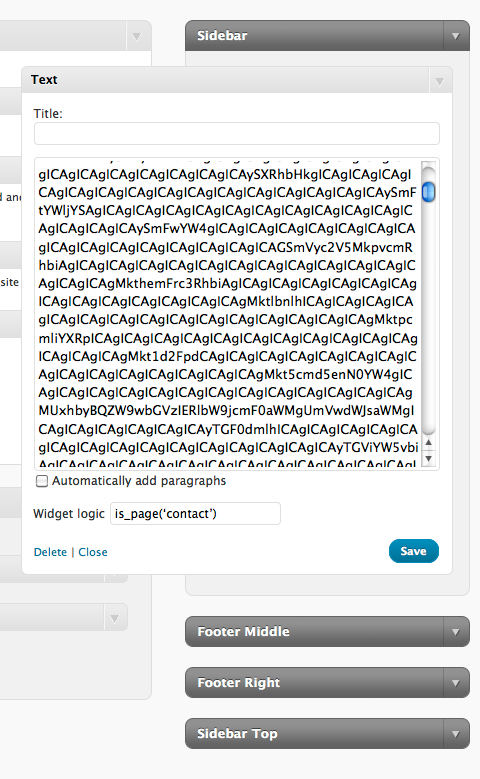
Looking at the example below, you’ll see that the condition is set to is_page(‘contact’). What this is saying is “if this page is called ‘contact’ then display everything that is in this widget. Otherwise, don’t display this widget.
Pretty neat huh?
Some Basic Logic
Here are some examples of simple logic statements you may find useful for your own WordPress site:
- is_home() – this will make the condition true only on the home page
- is_page(‘contact’) – check for the page called contact (replace ‘contact’ with the name of any page to change the logic) and display this widget
- is_single() – this will make the condition true for an individual blog post
You can also create more complex logic statements:
- “is_page(‘home’) || is_page(‘about’) – this will display the widget on the home page and about page
The possibilities are endless!
How To Add The Widget Logic Plugin
You can grab a copy of the Widget Logic plugin by visiting http://wordpress.org/extend/plugins/widget-logic/.
After activating the plugin, go to your Widgets menu (it’s under Appearance in your navigation menu) and drag a widget from the widget bin to your sidebar. Configure your widget and then look for the field at the bottom of the widget labeled “Widget logic” and fill in your logic statement. If you already have widgets available in your sidebar, simply open the widget and you’ll see the new widget logic field that can now be customized.
What If I Want This Widget To Appear On All Pages?
Great question! Just leave the widget logic statement blank and the widget will not be subject to any conditions and will appear on all posts / pages / index page of your WordPress site.
iChat: WordPress Plugin Questions
If you have any questions about installing a plugin, or want to know more about a particular plugin and how it works, just let me know by posting a comment below.


Hi, I’ve been using widget logic for ages, and suddenly it will not accept conditional tags for the Twitter widget. I enter the conditional tag, press save, and it disappears. I have tried disabling all other plugins but this is still the case. Any ideas? Funnily I have used twitter widget successfuly before with widget logic.